WhichBox – AI Assistant App

Do you remember which one of those boxes in the garage has your old phone? Or that toy your child wants to play with again? Or the tripod you need for your weekend trip? Oh what about that massager that you could really use right now! You would probably have to dig through those boxes to find it. Same problem when moving. There are always some boxes that you don’t want to open right away, but you wish you could open just the right one when you need something.

I have created WhichBox – your AI Assistant to find that box. It uses latest Vision AI models to help you find things quickly. Here’s what you do –

  1. Take pictures of the content inside each labelled box to create an inventory.
  2. Use WhichBox to easily identify the box containing the item you are looking for.

You can check it out here – https://whichbox.streamlit.app/

The demo has four photos of labelled boxes with some content in them. Note that there can be multiple photos of the same box. You can take photos as you are filling up the box to capture things at the bottom.

You can ask for a specific thing, like “Find Fitbit” or just “fitbit”

You can go for a general category, like “Camera Equipment”

You can get all boxes containing “USB Adapters”

You can look for “Groot” or if you can’t remember the name of a specific toy then you can look for “all toys of movie characters”

For now, you can bring your own API Key and use your own photos to try this out.

WhichBox : https://whichbox.streamlit.app/

PackRaft with Xamarin and Microsoft Azure

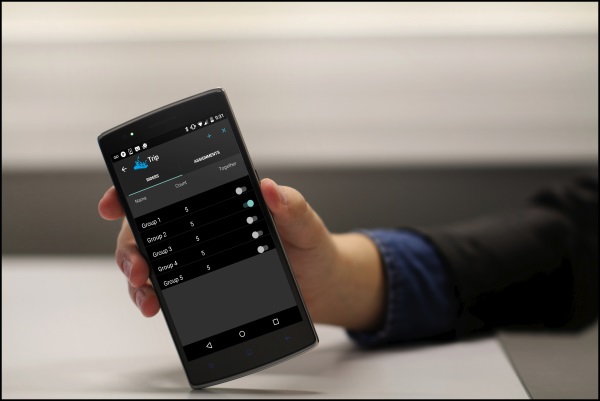
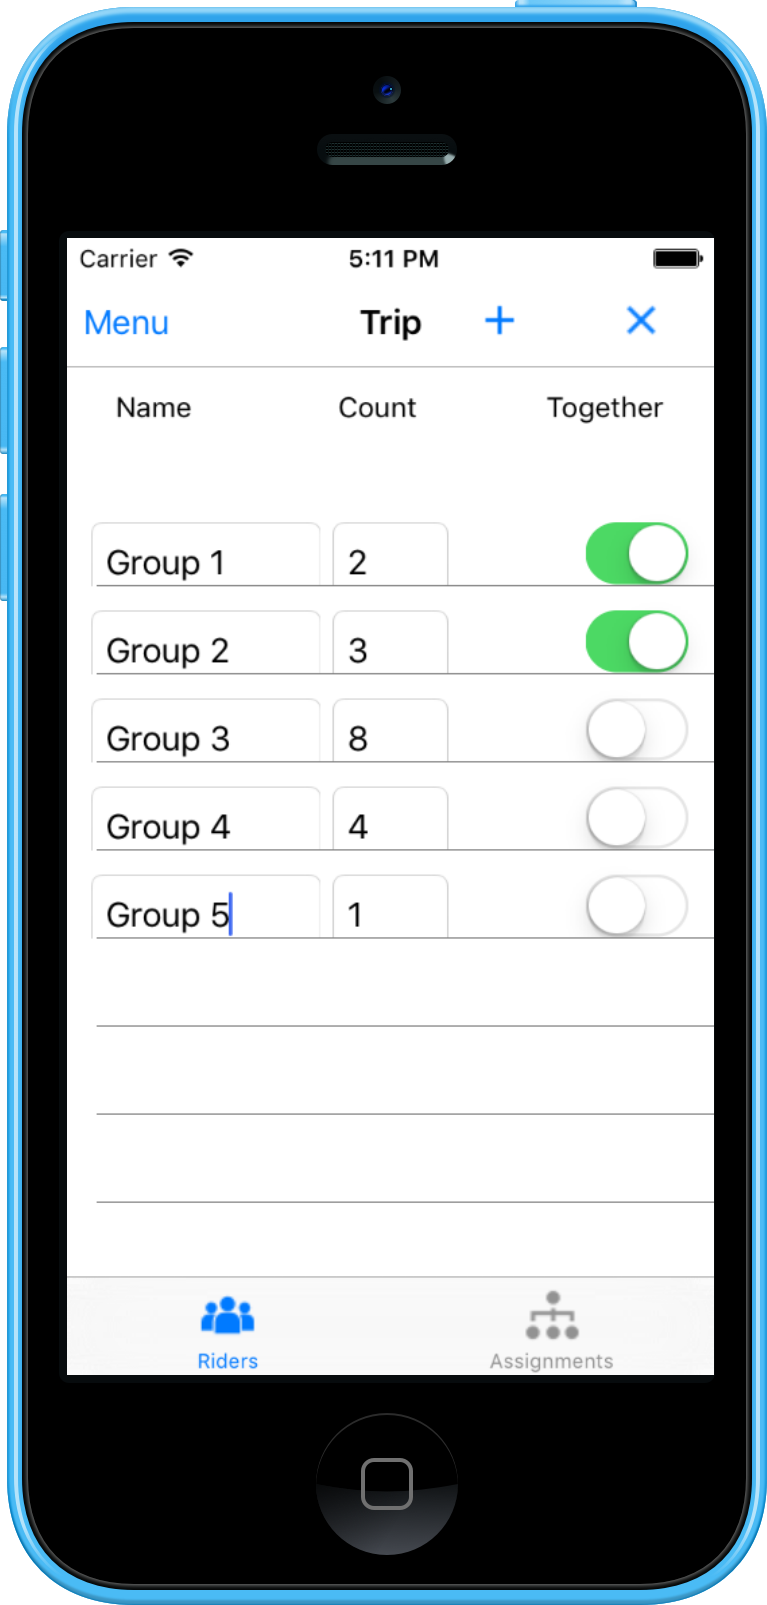
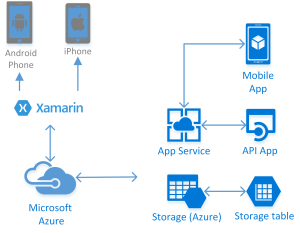
PackRaft is a cross-platform mobile application built with Xamarin. It integrates with Microsoft Azure services, such as Azure Table Storage and Azure App Service. It is created with Xamarin.Forms for iOS and Android (Windows version will be coming soon).

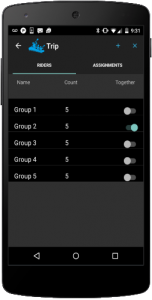
packraft-android-riders   packraft-iphone-assignments

The purpose of creating this sample application was to expand expertise in cross-platform mobile development with Windows Azure integration, specifically with Xamarin.Forms and Azure App Service. With Xamarin.Forms, it is possible to achieve close to 100% code reuse across these platforms for certain type of apps. Azure App Service provide a set of rich cloud backend services for your mobile applications.

PackRaft-Platform

PackRaft allows the user to setup a fleet of vehicles of various seating capacities. Groups of riders are assigned to these rides according to the count of riders in each group. You can specify that certain groups be kept together on a single vehicle – and the app tries to honor those requests if possible. I did this via a rudimentary implementation of a bin packing algorithm. This implementation is deployed as an API App in Microsoft Azure.

PackRaft uses Azure Mobile Services SDK to persist Fleet data to Azure Table Storage and to authenticate users with Facebook and Microsoft accounts. Twitter and Google account authentication is also supported by Azure Mobile Services SDK out of the box and those will also be enabled in PackRaft soon.

PackRaft is available on Android, iPhone and iPad.
Get it on Google Play

Download iOS app on App Store

Creating Android Apps using C# and Xamarin

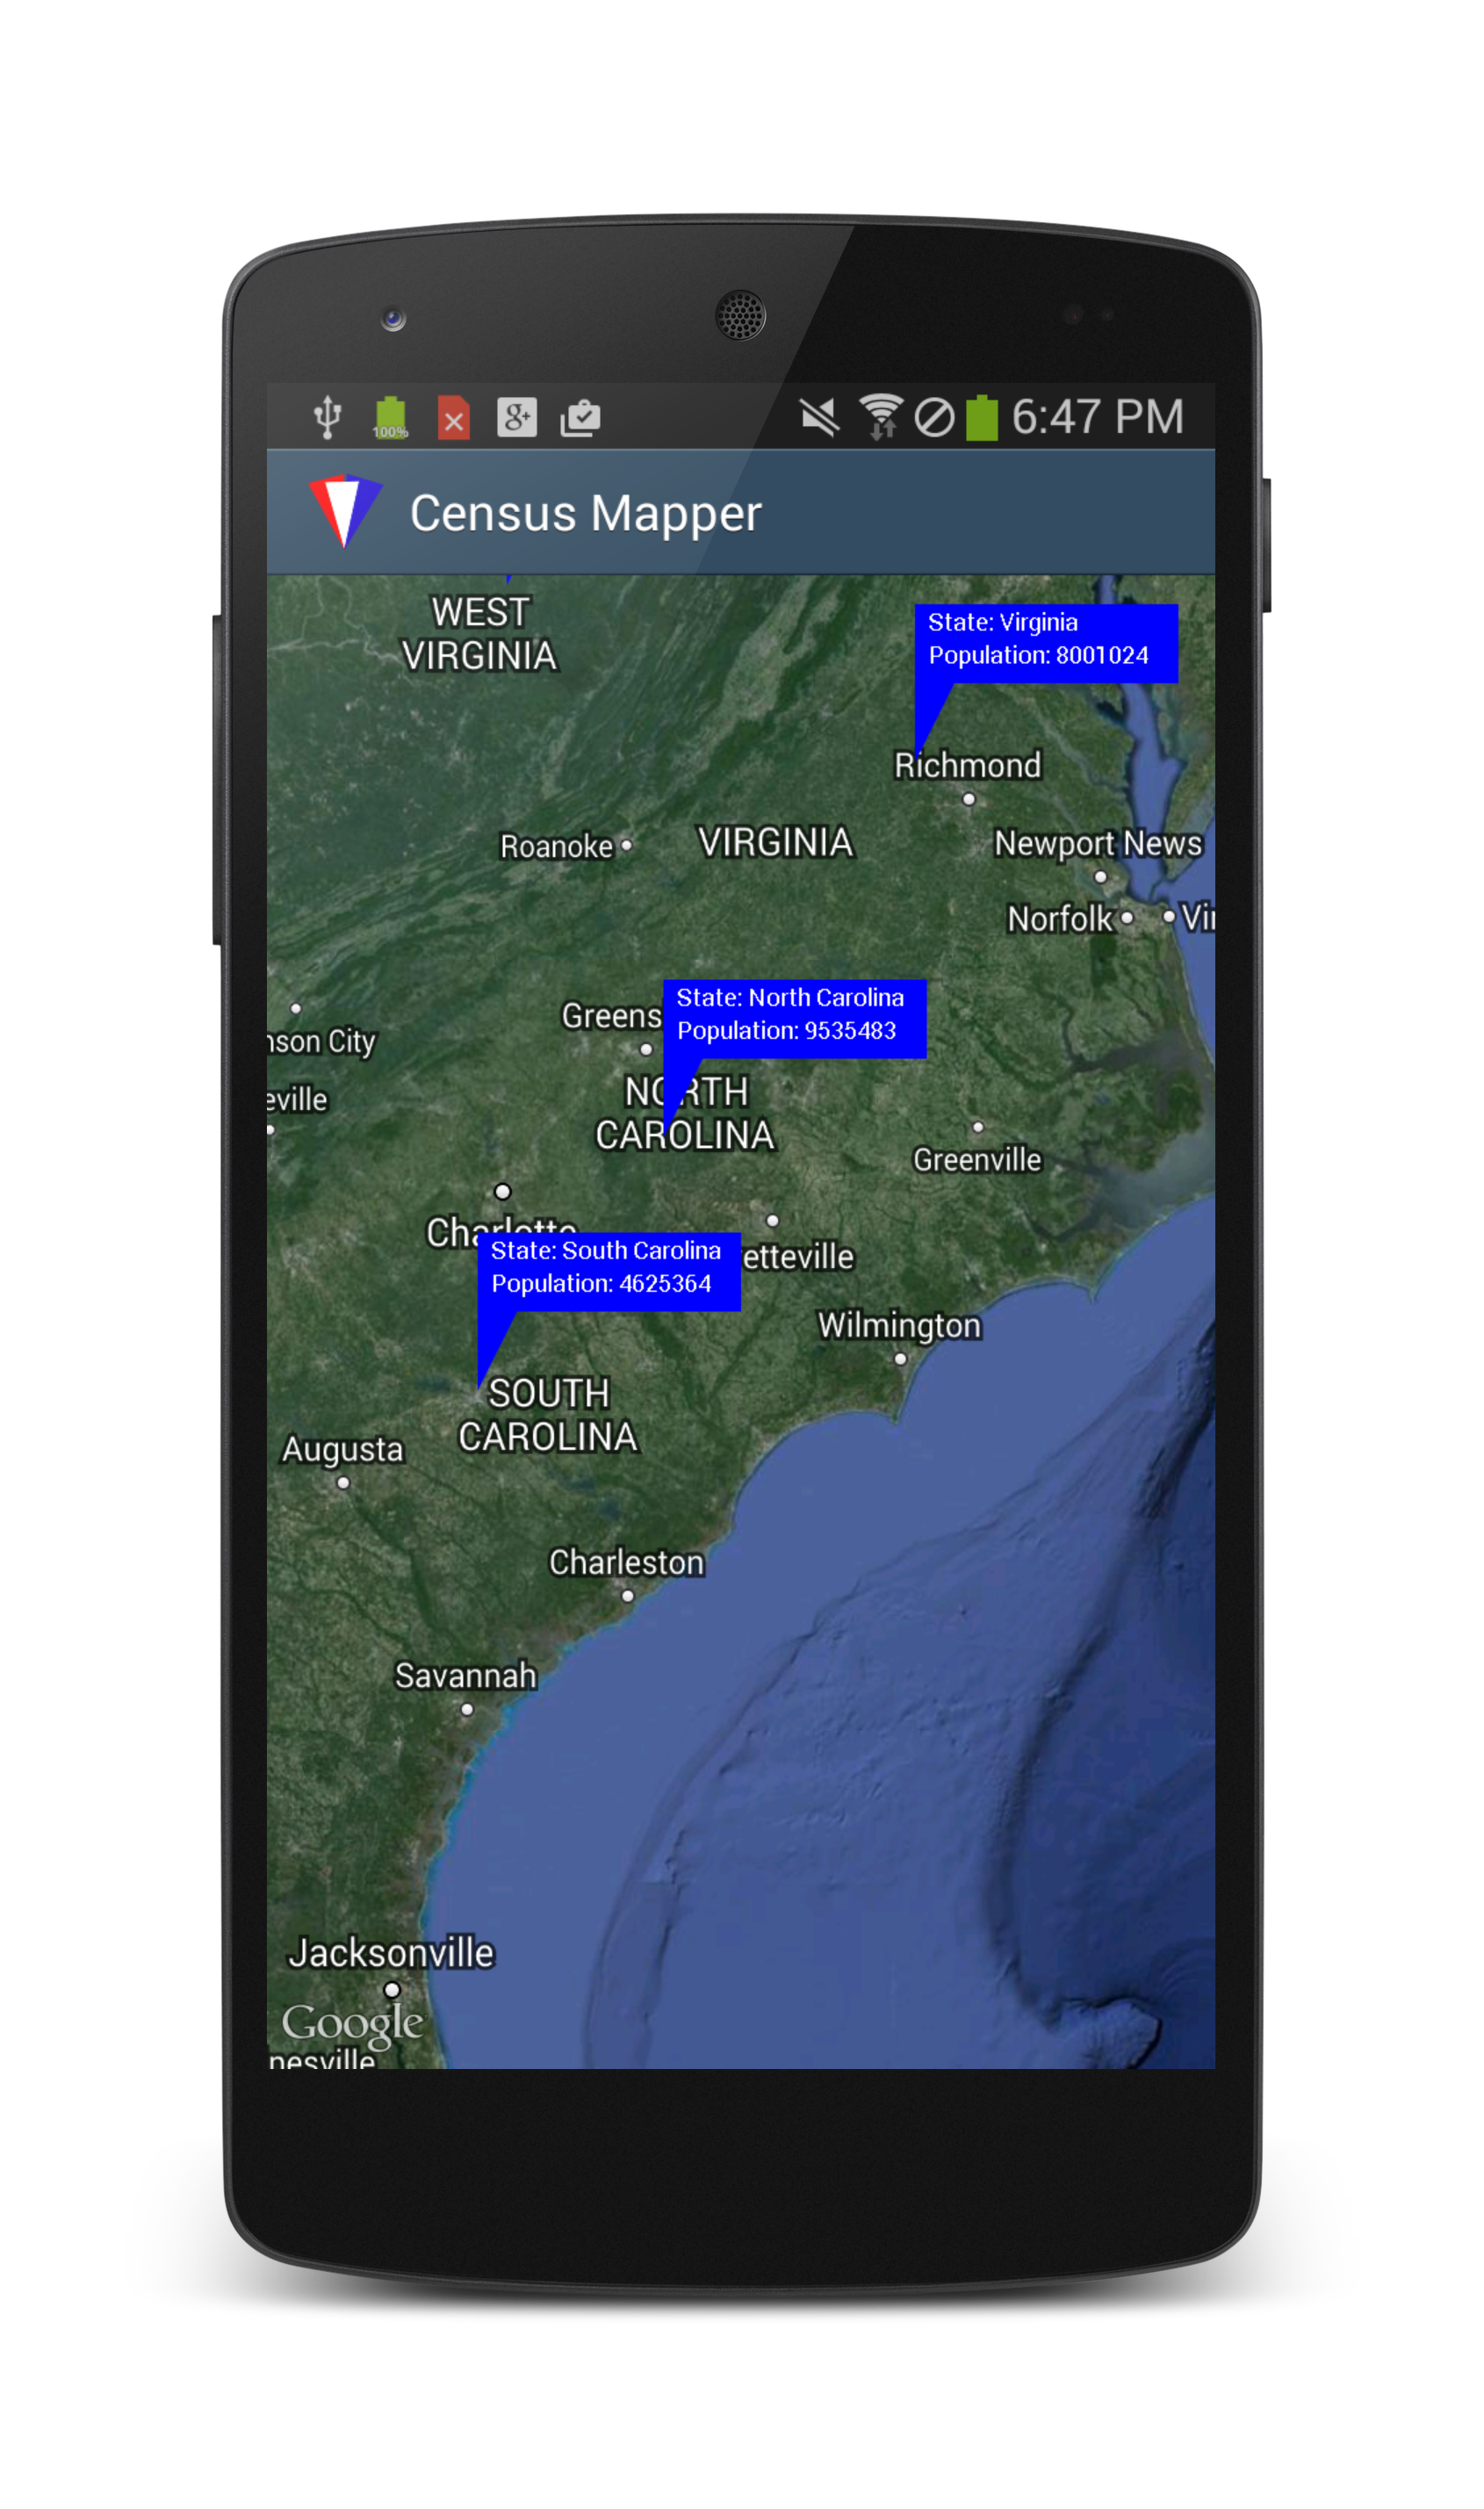
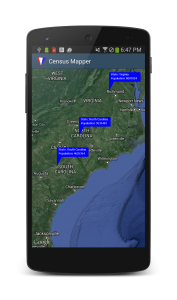
You can create native Android and iOS applications using C#, with Xamarin. I explored the capabilities of Xamarin tools and the development experience with Xamarin to create an Android version of CensusMapper. CensusMapper displays U.S. Census data on a Map. I created the original application for Windows 8 (WinRT) using C#. I have since converted it to an MVVM (C#) application, HTML/Javascript (WinJS) version and more recently to a Universal Windows App running on Windows Phone 8.1 and Windows 8.1. In that tradition, now it is faithfully ported to run on Android devices, using C# and Xamarin. CensusMapper is available on Google Play Store.
censusmapper-android-on-nexus5

CensusMapper.Android shows population of each U.S. State. User can tap on a location on the map to show the population (as per 2010 census) of the zip code containing the selected location. User can select a location to view the population compared to the containing geography, as a pie-chart.

This experimental project helped me expand my cross-platform mobile application development skillset in the following areas:

  • Using Xamarin/C# to create an Android app using Xamarin Studio on a PC and a Mac.
  • Structuring C#/.NET source code in a Portable Class Library to allow reuse on Windows, Windows Phone, Android and iOS platforms.
  • Converting the functionality of an existing Windows Universal App (Windows Phone/ WinRT) to an Android app.
  • Using GoogleMaps API (via Google Play Services) to display data retrieved from U.S. Census API.
  • Using Bing Maps API for reverse geocoding in an Android app.
  • Creating custom markers using low-level API in Android.Graphics namespace to display information on the map.
  • Charting with oxyplot cross-platform charting library.
  • Working with Android SDK, AVD Manager as well as developer documentation and resources on Android and Xamarin websites in the development lifecycle of the app.
  • Publishing an app on Google Play Store.

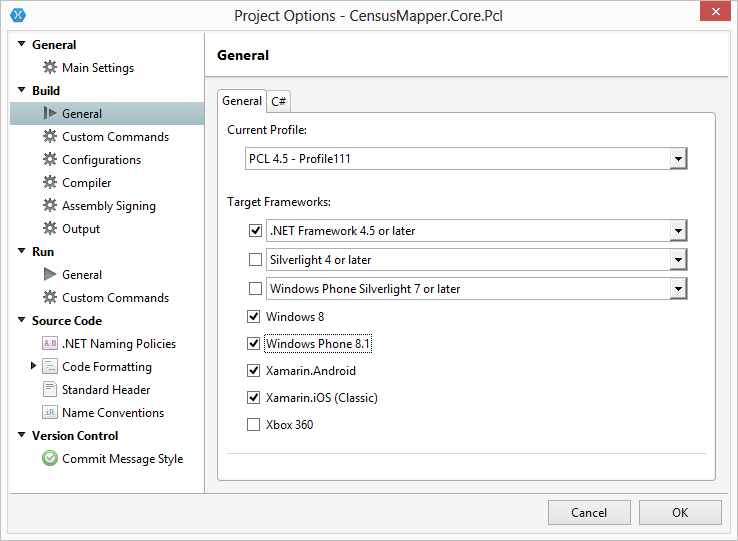
I started with Xamarin.Forms.Maps. It was quick and straight forward to create a Xamarin.Forms app. The tricky part was creating the custom markers (the shape of speech bubble) on the map, instead of using the default push-pin markers . I tried creating a CustomRender to create custom markers and built interactivity with the map elements, but it turned out to be too much hassle. All of that customization would be specific to Android platform only and not reusable on the iOS anyway. So, I decided against using Xamarin.Forms and work directly with Google Maps library. Xamarin.Forms also limits me to Windows Phone 8 compatibility in my PCL. I can’t use Windows Phone 8.1 in any PCL profile compatible with Xamarin.Forms. It also requires a minimum of Android 4.0. The PCL profile # 111 for sharing code between Windows 8, Windows Phone 8.1 as well as Android and iOS, is not compatible with Xamarin.Forms at the time of writing this.
pcl-profile-111

Don’t use the Android emulator for testing. Get a real device. I stopped using the emulator while working on CensusMapper because GooglePlayServices (GPS) dependency was making me jump through way too many hoops. Debugging map functionality on the real device was a much more productive experience. Then I discovered Xamarin’s Android Player. It is awesome. By all means, use it! It is a pleasure to work with, especially on a Mac. Don’t be discouraged by the preview/beta status. It blows the Android SDK virtual devices out of the water, in terms of performance and usability.

I tested on Google Nexus 4 (Android 4.2), Samsung Galaxy SIII (Android 4.3) , BLU Dash JR (Android 4.4) and an older Coby Kyros tablet (Android 2.2). Google Play Services update, required for the app to work, could not be installed on BLU device because of the limited storage space. You must root the device in order to install the GPS updates on an SD card. It is advisable to have a root-friendly device. Google Nexus devices are excellent development devices, allowing you root access and the ability to load custom ROMs. However, it is very important for you to get a few different kinds of devices of various form factors and Android versions/API levels for testing your app’s functional and non-functional aspects.

Android device logs and the IDE build logs are the most important tools you have to resolve problems encountered in the Android app development with Xamarin. These should be the first places to look when troubleshooting issue.

Versions used in this project:
Xamarin 3.8.
Xamarin Studio 5.7
Xamarin Android 4.20.0

Get it on Google Play

Announcing New CodeDemo Feature – ZoomIt Integration

I am very excited to announce a new feature of CodeDemo. This feature integrates with ZoomIt and enables you to use ZoomIt much more fluently.

ZoomIt is a great presentation tool. It helps speakers and presenters deliver very effective presentations. But many presenters are not using this great tool as much and as effectively as it can be used. The reason is that ZoomIt has a bit of a learning curve. It takes practice to use it fluently. You have a lot going on in your mind while you are doing a presentation. Using ZoomIt distracts you from your presentation. Practice helps you get over this distraction. A lot of presenters use ZoomIt very effectively with practice. But for the rest of us, ZoomIt mastery has been elusive.

I have experimented and practiced (a lot) with several different ways to gain fluency with ZoomIt, including using custom keyboard combinations, but I could never get to the point where using ZoomIt feels like second nature. I realized that the mental and visual shift it takes to locate the keyboard combination and execute ZoomIt command with two fingers breaks the flow of the presentation and causes the distraction. I came up with a new way to use ZoomIt that has helped me immensely. And I added that as a feature in CodeDemo, so now you can use this method too.

Some of you are familiar with CodeDemo. For those who are not, it is another new tool for presenters. I created this tool to make it easier to use code snippets in your presentations. ZoomIt integration is a new feature of CodeDemo. To use this feature –

  1. Start ZoomIt. If ZoomIt is not running, the commands will be simply ignored.
  2. If you use custom keyboard combinations in ZoomIt, you will need to reset them back to defaults –
  • Ctrl+1 to Zoom
  • Ctrl+2 to Draw
  • Ctrl+4 to LiveZoom
  1. Start CodeDemo.
  2. Open a demo file. Any demo file will do. You must have a demo file open to call ZoomIt. If QuickStart.txt is already open in CodeDemo, you do not need to load another file. You can open Quickstart.txt file by clicking on the “Quickstart” button in the top menu.
  3. Now the key step – do a quick double-tap on the CTRL key. ZoomIt will be invoked and you will see a zoomed-in portion of your screen.
  4. At this point, you use ZoomIt as you normally do.
    • Click to freeze the visual.
    • Press Ctrl key and use the mouse to draw a rectangle on the screen.
  5. Double-tap on the CTRL key (or press ESCAPE key) to exit ZoomIt “Zoom”.
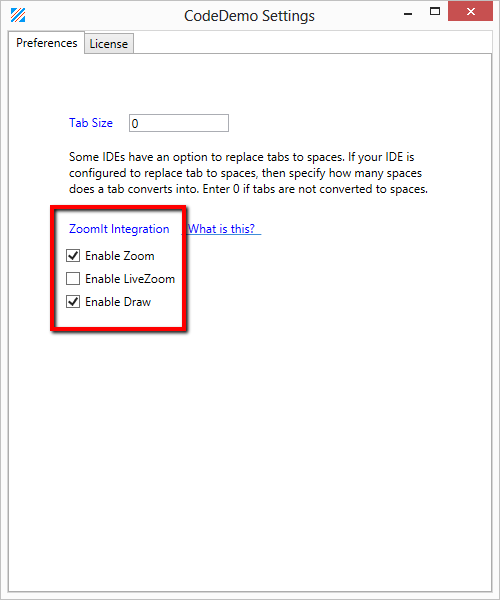
  6. You can also invoke ZoomIt “Draw” with a quick double-tap on the ALT key and ZoomIt “LiveZoom” with a quick double-tap on the SHIFT key. You may need to enable ZoomIt integration from the settings panel in CodeDemo :

Invoking ZoomIt with a quick double-tap using just the index finger (or thumb) did the trick for me. I do not have to direct my attention to the keyboard anymore. The CTRL key is right there at the bottom corner of my keyboard and I can invoke ZoomIt without moving my eyes, my hand or my mind. There is only one thing to remember while using ZoomIt from CodeDemo – The CTRL key. That’s all. That one key will take care of 90% of what you need, to become effective with ZoomIt.

You can get CodeDemo from http://www.codedemo.net.

Photo Credit : http://thenounproject.com/term/gift/13360/

Announcing CodeDemo

It is a challenge to use code snippets in presentations, demos and live coding sessions. I have struggled with this and seen many speakers jumping through hoops to assimilate code snippets in their demos. I had to create something to ease this pain.

Today, I am announcing the general availability of CodeDemo. A tool for instructors, presenters and speakers who create instructional demos, record screen-casts or do live presentations. CodeDemo pastes code snippets into your favorite IDE without getting in your way.

I decided not to open-source CodeDemo to challenge myself to an exercise in commercialization. I decided to learn about entrepreneurship, marketing, sales, licensing and other aspects of software commercialization. It has been an MBA’s worth of education so far. This journey is not over yet. I am taking the Lean approach of creating a Minimum Viable Product. The future of CodeDemo, its feature set and the price, will be shaped by the traction it gets in the market, the feedback from the customers as well as patterns of use reported by the users.

Head over to http://codedemo.net to grab a copy for yourself. Let me know if find it useful – I will be very excited to hear from you.

Here is a quick 2 minute introduction to CodeDemo :

[youtube]aFn3boBAWjw[/youtube]


Windigo 1.1 Released

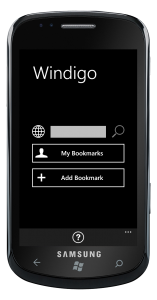
windigo-samsungWindigo is a windows phone app to access your diigo account on windows phone 7.

Create, edit and search diigo bookmarks. Slick, to-the-point interface. Browse and search public bookmarks of other diigo users. Tap on the bookmark for details, including tags. Tap on any tag to narrow your search. Trial version is available.

Windigo 1.1 is out on the windows phone marketplace now.  Highlights of this update :

– Last SearchScope used is now persistent
– Fixed search when a search term is picked from suggested words
– Problem report now includes system info
– Handle crash on navigating from main page
– Fixed feature tracking for analytics
  • Last SearchScope used is now persistent
  • Fixed search when a search term is picked from suggested words
  • Problem report now includes system info
  • Handle crash on navigating from main page
  • Fixed feature tracking for analytics